This guide explains how to connect your TK WebHosts email address (for example, info@yourdomain.com) to your personal Gmail account. This allows you to send and receive domain emails directly from Gmail, using Gmail’s interface while keeping your professional email identity.
What You’ll Need Before You Start
- An active email account created in TK WebHosts
- Your email address and password (e.g. info@yourdomain.com)
- Access to your Gmail account
- (Optional but recommended) Correct MX, SPF, and DNS records already configured for TK WebHosts
If your domain email is not yet working, make sure it is properly connected to TK WebHosts first.
Part 1: Add Your TK WebHosts Email to Gmail (Receive Emails)
This step allows Gmail to fetch incoming emails from your TK WebHosts mailbox.
Step 1: Open Gmail Settings
- Log in to your Gmail account.
- Click the gear icon (⚙) in the top-right corner.
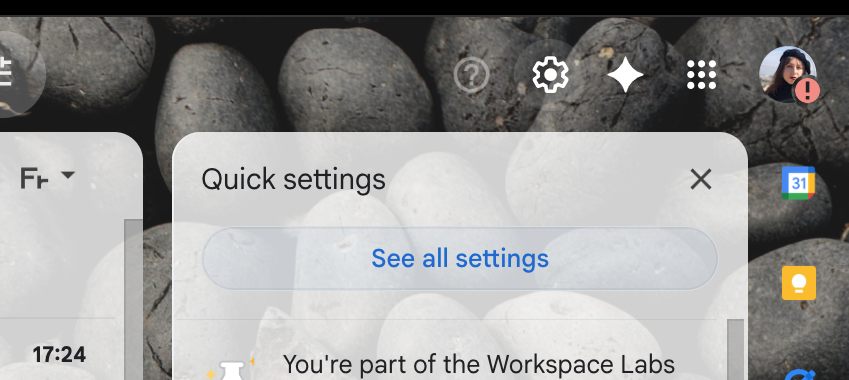
3. Select See all settings.
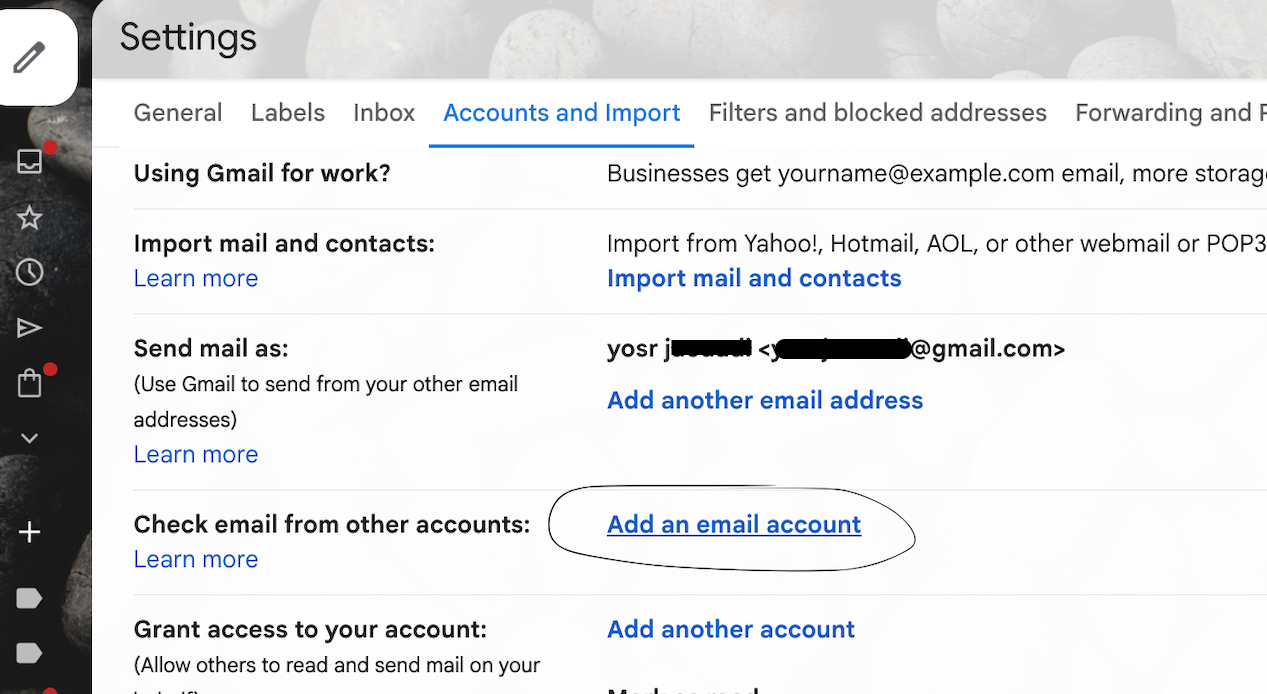
Step 2: Go to Accounts and Import
- Open the Accounts and Import tab.
- Under Check mail from other accounts, click Add a mail account.
Step 3: Enter Your TK WebHosts Email Address
- Enter your full email address (e.g. info@yourdomain.com)

- Click Next
Step 4: Configure POP3 Settings

Choose Import emails from my other account (POP3) and enter the following details:
- Username: your full email address
- Password: your email account password
- POP Server:
- pixel.mxrouting.net
- Port: 995
Recommended settings:
- Leave a copy of retrieved message on the server.
- Label incoming messages (optional)
- Archive incoming messages (optional)
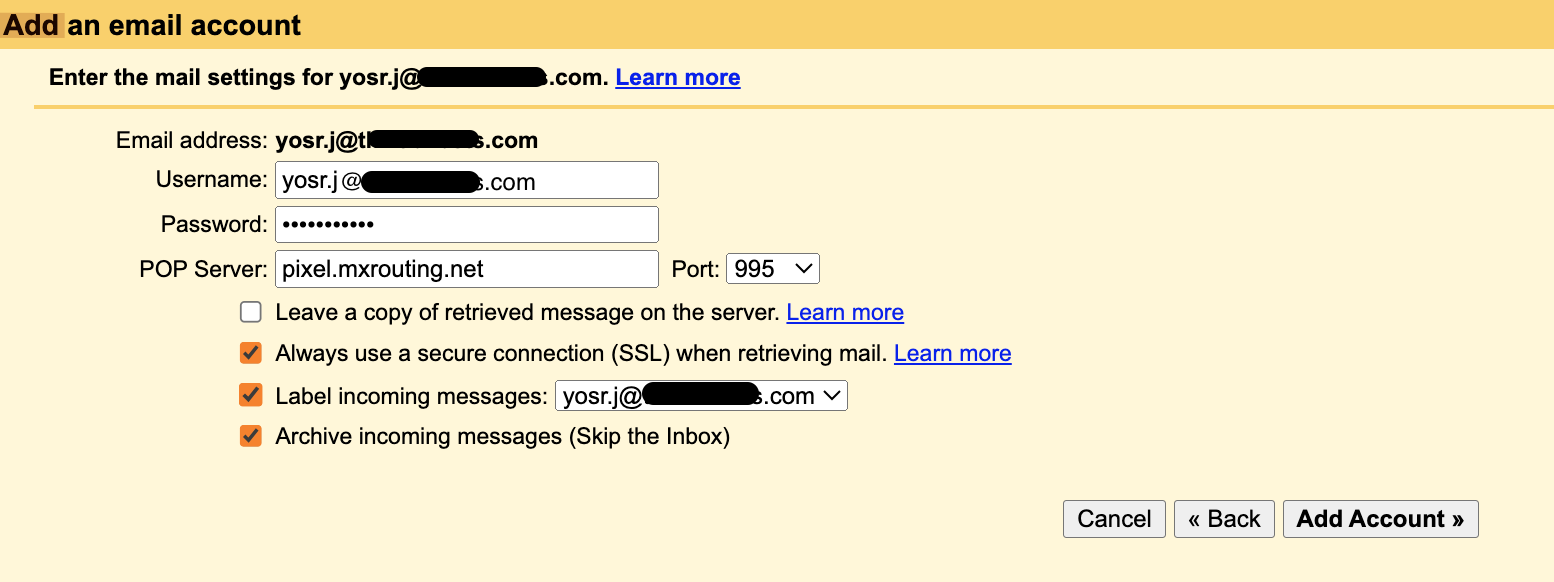
Click Add Account.
Part 2: Send Emails from Gmail Using Your Domain Email
This step ensures emails sent from Gmail appear as info@yourdomain.com, not your personal Gmail address.
Step 1: Add a Send-As Address
- In Accounts and Import, go to Send mail as
- Click Add another email address.
Step 2: Enter Sender Details
- Name: Your name or company name
- Email address: info@yourdomain.com
- Leave Treat as an alias checked
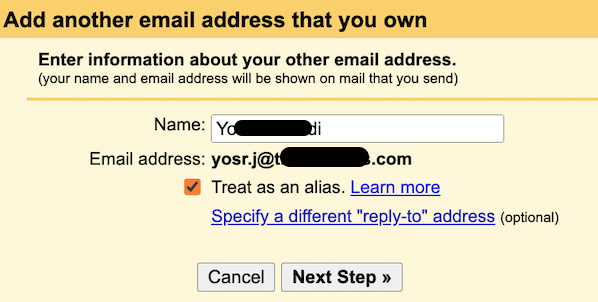
- Click Next Step
Step 3: Configure SMTP Settings
Enter the following:
- SMTP Server:
- pixel.mxrouting.net
- Port: 465 (SSL)
- Username: full email address
- Password: email account password
- Encryption: SSL or TLS
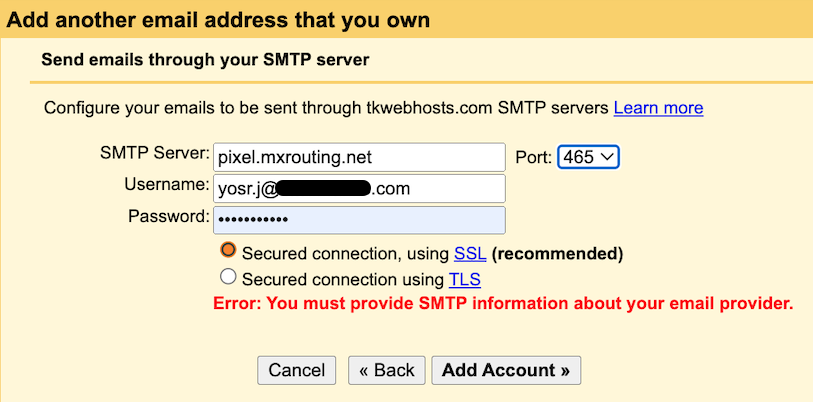
Click Add Account.
Step 4: Verify Ownership
Gmail will send a verification email to your TK WebHosts email address.
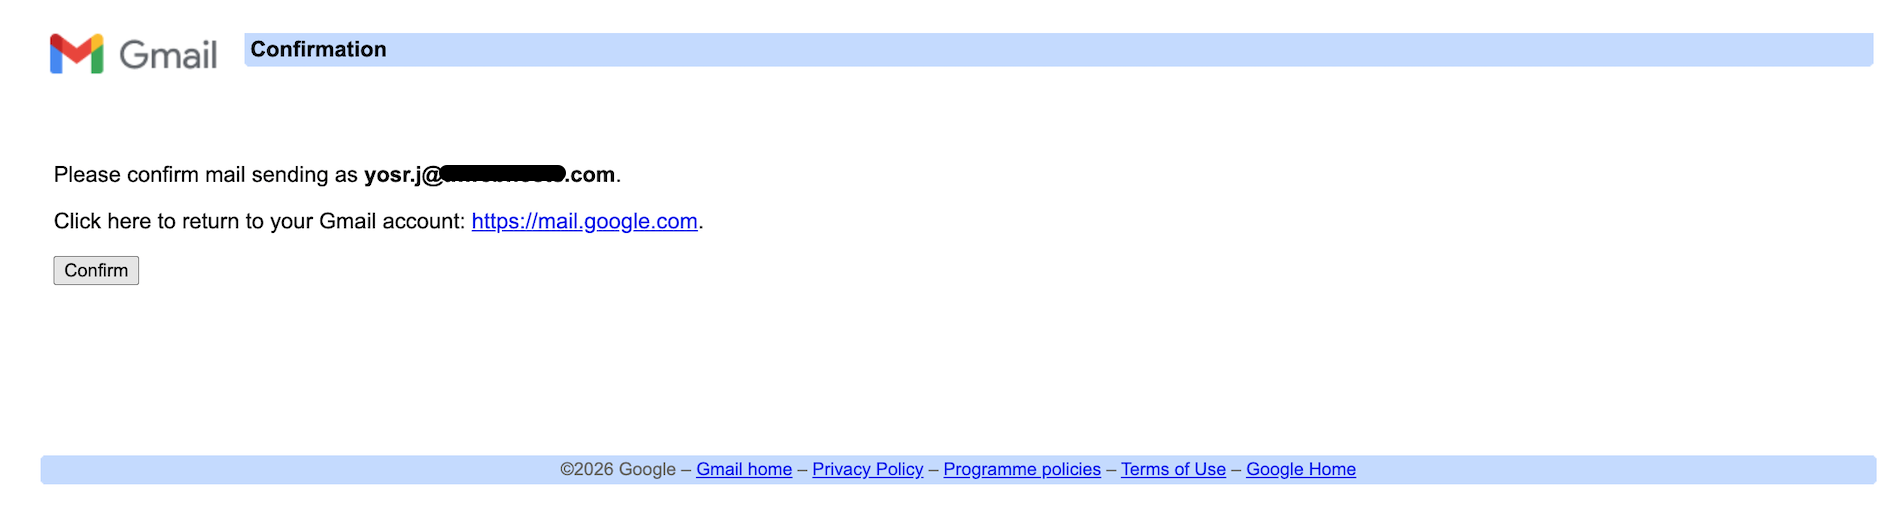
- Click on the link from your mailbox or webmail

Part 3: Set Default Sending Address (Optional)
To always send emails from your domain address:
- Go to Accounts and Import
- Under Send mail as, select Make default next to your domain email
